
Regular cartridge replacement is essential to keep your undersink water filter performing at its best. Whether you use a sediment, carbon, or reverse osmosis system, clean filters ensure your drinking water remains safe, fresh, and contaminant-free.
How Often Should You Replace Filter Cartridges?
- 1 Micron Sediment Filter: every 6–12 months
- Carbon Block Filter: every 6–12 months
- Alkaline or CTO (Taste & Odour) Filter: every 6–12 months
- RO Membrane (if applicable): every 2–4 years
Tip: If you notice reduced water flow, unusual taste or odour, it’s likely time to replace your cartridges.
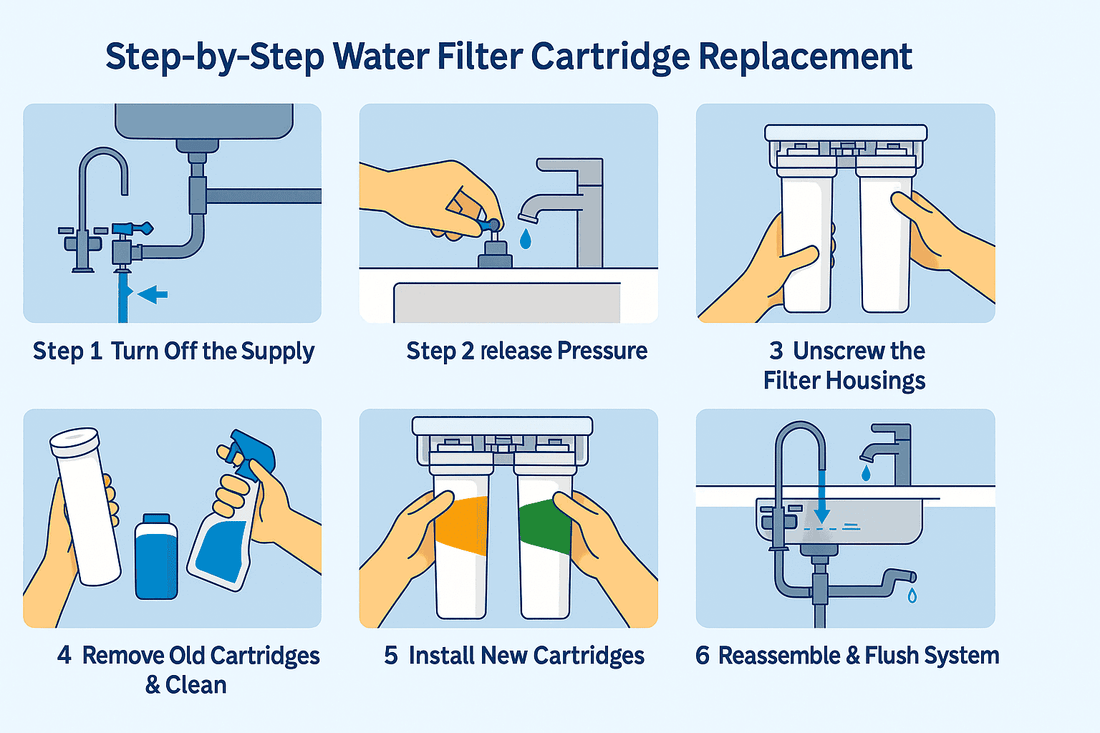
Step-by-Step: Replacing Your 10” Standard Cartridges
What You’ll Need:
- Replacement filter cartridges (Shop cartridges here)
- Filter housing wrench
- Clean towel
- Gloves (optional)

Step 1: Turn Off the Water Supply
Locate and close the cold water isolation valve under your sink. Also turn off the tank tap (if part of a reverse osmosis system).
Step 2: Release Pressure
Turn on your filtered water tap to release pressure from the system before opening the housings.
Step 3: Unscrew the Filter Housings
Use the filter wrench to unscrew the housings. Place a towel underneath to catch any water spillage.
Step 4: Remove Old Cartridges & Clean
Discard used cartridges. Rinse housings with clean water. Use a mild sterilising solution if needed and wipe dry with a clean cloth.
Step 5: Install New Cartridges
Install new cartridges in the correct order: sediment filter (inlet), carbon filter (second). Make sure the O-rings are seated properly.
Step 6: Reassemble and Turn Water Back On
Screw housings back in place and slowly turn on the isolation valve. Let water run through the system for 5–10 minutes to flush the new filters.
Shop Replacement Cartridges
At Puregold, we offer full replacement packs and individual cartridges for all standard 10” systems.